
Membuat Repository di Cisco ISE 2.x
Repository di Cisco ISE dibutuhkan dalam proses backup dan restore. Dalam lab ini saya menggunakan Windows 7 yang diinstal FTP server sebagai lokasi repository saya. VM ini diletakkan dalam network yang sama dan reachable dari VM Cisco ISE.
Cisco ISE
Ada 2 cara membuat repository, CLI dan GUI. Cisco merekomendasikan untuk membuat repository melalui GUI, dengan alasan berikut:
- Repositories that are created through the CLI are saved locally and do not get replicated to the other deployment nodes. These repositories do not get listed in the GUI’s repository page.
- Repositories that are created on the Primary PAN get replicated to the other deployment nodes.
Persiapan
Harus dilakukan dengan privilege Super Admin atau System Admin.
Step 1
Pilih Administration > System > Maintenance > Repository.
Step 2
Klik Add untuk menambahkan repository.
Step 3
Masukkan value yang diperlukan. Cek tabel Repository Settings dibawah untuk penjelasan tiap field.

Step 4
Klik Submit untuk membuat repository baru. Di Repository List terlihat repository yang baru dibuat.

Step 5
Validasi repository yang baru dibuat.
Masuk ke halaman Repository List, lalu pilih repository yang akan divalidasi kemudian pilih Validate.

Untuk validasi dengan CLI, ketik command ini:
show repository repository_name
Dimana repository_name adalah nama repository yang baru dibuat.
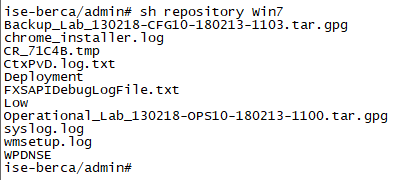
Note: Jika path yang diisikan saat membuat repository tidak eksis, maka error dibawah akan muncul: %Invalid Directory.
Repository Settings

